Java Servlet 知识点整理
前言
- Servlets 是一些实现java Servlet API 的类,用于实现http的请求和响应。
- 一个Servlet类必须被部署到Servlet容器才可用,如tomcat
- 像jsp,jsf都最终会被转换为Servlet类
第一个 Servlet 例子
- 下面是一个很简单的例子,但是可以了解到servlet的原理所在
- 使用mvn创建一个 webapp 项目,在pom.xml添加如下依赖
1
2
3
4
5
6<dependency>
<groupId>javax.servlet</groupId>
<artifactId>servlet-api</artifactId>
<version>2.5</version>
<scope>provided</scope>
</dependency>
build 配置如下
1
2
3
4
5
6
7
8
9
10
11
12
13
14
15
16
17
18
19
20
21
22
23
24<build>
<finalName>ServletDemo</finalName>
<plugins>
<plugin>
<groupId>org.codehaus.mojo</groupId>
<artifactId>tomcat-maven-plugin</artifactId>
<version>1.1</version>
<configuration>
<url>http://localhost:8080/manager/text</url>
<server>tomcat</server>
<path>${finalName}</path>
</configuration>
</plugin>
<plugin>
<groupId>org.apache.maven.plugins</groupId>
<artifactId>maven-surefire-plugin</artifactId>
<version>2.18.1</version>
<configuration>
<skipTests>true</skipTests>
</configuration>
</plugin>
</plugins>
</build>代码如下
1
2
3
4
5
6
7
8
9
10
11
12
13
14
15
16
17
18
19
20
21
22
23
24
25
26
27
28
29
30
31
32
33
34
35
36
package com.walterlife;
import java.io.IOException;
import java.io.PrintWriter;
import javax.servlet.http.HttpServlet;
import javax.servlet.ServletException;
import javax.servlet.http.HttpServletRequest;
import javax.servlet.http.HttpServletResponse;
public class ServletDemo extends HttpServlet {
public void doGet(HttpServletRequest request, HttpServletResponse response) throws IOException, ServletException {
response.setContentType("text/html;charset=utf-8");
PrintWriter out = response.getWriter();
try {
// Write some content
out.println("<html>");
out.println("<head>");
out.println("<title>MyFirstServlet</title>");
out.println("</head>");
out.println("<body>");
out.println("<h2>Servlet MyFirstServlet at " + request.getContextPath() + "</h2>");
out.println("</body>");
out.println("</html>");
} finally {
out.close();
}
}
public void doPost(HttpServletRequest request, HttpServletResponse response) throws IOException, ServletException {
}
public String getServletInfo() {
return "MyFirstServlet";
}
}在 web.xml 中配置 Servlet 类
1
2
3
4
5
6
7
8
9
10
11
12
13
14
15
<!DOCTYPE web-app PUBLIC
"-//Sun Microsystems, Inc.//DTD Web Application 2.3//EN"
"http://java.sun.com/dtd/web-app_2_3.dtd" >
<web-app>
<servlet>
<servlet-name>Servlet Name For Demo1</servlet-name>
<servlet-class>com.walterlife.ServletDemo</servlet-class>
</servlet>
<servlet-mapping>
<servlet-name>Servlet Name For Demo1</servlet-name>
<url-pattern>/Demo1</url-pattern>
</servlet-mapping>
</web-app>代码解释
- class ServletDemo extends HttpServlet 这个是必须的,因为 Servlet 类要不继承自 java.Servlet.http.HttpServlet,要么继承自java.Servlet.GenericServlet
- 重写 doGet doPost 函数 当后端收到 GET POST请求时,最终都会路由到 doGet doPost 函数中
- HttpServletRequest HttpServletResponse 是 doXXX 的默认参数
Servlet 生命周期相关函数
- 当程序启动时,Servlet也随之创建,程序结束时,Servlet也随之销毁。
- Servlet的创建和销毁是有 Servlet的 life cycle methods 管理的
- init(), service(), destroy() 这三个函数是 每一个 Servlet 都要实现的,并且会在适当的时机被调用
- 在Servlet 初始化时, web Servlet 容器会通过调用 init 函数来初始化Servlet
- 指定参数 java.servlet.ServletConfig,这个参数可以时Servlet类可以获取 web.xml 配置 k-v键值对配置信息
- 该函数只会调用一次
1
2
3
public void init() throws ServletException {
}
- 初始化后,Servlet可以为所有请求服务了,web Servlet container 调用service() 来处理所有请求的
- 该函数就是讲不同类型的请求路由到不同的处理函数上去
- 开发人员必须实现该函数[web Servlet container]
- 自定义 Servlet在大多数场景下不需要重写该函数
1
2
3
4
5
6
7
8
9
10
11
12
13
14
15
16
17
18
19
20
21
22
23
24
25
26
27
28
29
30
31
32
33
34
35
36
37
38
39
40
41
42
43
44
45
46
47
48
49
50
51
52
53
54
55
56
57
58
59
60
61
62
63
64
65
66
// 代码摘抄自 taomcat7 java.javax.servlet.http.HttpServlet 中
protected void service(HttpServletRequest req, HttpServletResponse resp)
throws ServletException, IOException {
// 获取web 请求的方式
String method = req.getMethod();
if (method.equals(METHOD_GET)) {
long lastModified = getLastModified(req);
if (lastModified == -1) {
// servlet doesn't support if-modified-since, no reason
// to go through further expensive logic
doGet(req, resp);
} else {
long ifModifiedSince;
try {
ifModifiedSince = req.getDateHeader(HEADER_IFMODSINCE);
} catch (IllegalArgumentException iae) {
// Invalid date header - proceed as if none was set
ifModifiedSince = -1;
}
if (ifModifiedSince < (lastModified / 1000 * 1000)) {
// If the servlet mod time is later, call doGet()
// Round down to the nearest second for a proper compare
// A ifModifiedSince of -1 will always be less
maybeSetLastModified(resp, lastModified);
doGet(req, resp);
} else {
resp.setStatus(HttpServletResponse.SC_NOT_MODIFIED);
}
}
} else if (method.equals(METHOD_HEAD)) {
long lastModified = getLastModified(req);
maybeSetLastModified(resp, lastModified);
doHead(req, resp);
} else if (method.equals(METHOD_POST)) {
doPost(req, resp);
} else if (method.equals(METHOD_PUT)) {
doPut(req, resp);
} else if (method.equals(METHOD_DELETE)) {
doDelete(req, resp);
} else if (method.equals(METHOD_OPTIONS)) {
doOptions(req,resp);
} else if (method.equals(METHOD_TRACE)) {
doTrace(req,resp);
} else {
//
// Note that this means NO servlet supports whatever
// method was requested, anywhere on this server.
//
String errMsg = lStrings.getString("http.method_not_implemented");
Object[] errArgs = new Object[1];
errArgs[0] = method;
errMsg = MessageFormat.format(errMsg, errArgs);
resp.sendError(HttpServletResponse.SC_NOT_IMPLEMENTED, errMsg);
}
}
- 最后 web Servlet container 将会调用 destroy() 来销毁 Servlet 的资源
- 你可以在 destory() 函数中销毁你想要销毁的资源
1
2
3
public void destroy() {
}
使用@WebServlet 注解 开发 Servlet
- 如果你不喜欢使用web.xml 配置文件方式来配置Servlet的话,你可以使用 @WebServlet注解来实现 web.xml的配置
注解servlet3.0 新加的特性,故在 pom.xml 需要增加 javax.servlet 3.0 以上的依赖
1
2
3
4
5
6<dependency>
<groupId>javax.servlet</groupId>
<artifactId>javax.servlet-api</artifactId>
<version>3.1.0</version>
<scope>provided</scope>
</dependency>示范代码如下,这样就需要在web.xml 中配置servlet相关信息
1
2
3
4
5
6
7
8
9
10
11
12
13
14
15
16
17
18
19
20
21
22
23
24
25
26
27
28
package com.walterlife.ServletDemo;
import java.io.IOException;
import java.io.PrintWriter;
import javax.servlet.ServletException;
import javax.servlet.annotation.WebServlet;
import javax.servlet.http.HttpServlet;
import javax.servlet.http.HttpServletRequest;
import javax.servlet.http.HttpServletResponse;
@WebServlet(name = "MyFirstServlet", urlPatterns = {"/MyFirstServlet"})
public class MyFirstServlet extends HttpServlet {
private static final long serialVersionUID = -1915463532411657451L;
@Override
protected void doGet(HttpServletRequest request,
HttpServletResponse response) throws ServletException, IOException
{
//Do some work
}
@Override
protected void doPost(HttpServletRequest request,
HttpServletResponse response) throws ServletException, IOException {
//Do some other work
}
}
将 Servlet程序部署至 Tomcat
- maven构建的项目,只需执行 mvn clean package tomcat:redeploy 就可以将生产的 war 包部署至 tomcat 服务器下
- 在浏览器下输入 http://localhost:8080/ServletDemo/Demo1 即可

在 Servlet返回处理中添加动态的内容
- 实现功能: 访问页面返回当前访问费页面的时间
代码如下
1
2
3
4
5
6
7
8
9
10
11
12
13
14
15
16
17
18
19
20
21
22
23
24
25
26
27
28
29
30
31
32
33
34
35
36
37
38
39
40
41
42
43
44
45
46
47
48
49
package com.walterlife;
import java.io.IOException;
import java.io.PrintWriter;
import javax.servlet.http.HttpServlet;
import javax.servlet.ServletException;
import javax.servlet.http.HttpServletRequest;
import javax.servlet.http.HttpServletResponse;
import java.util.Map;
import java.util.HashMap;
import javax.servlet.annotation.WebServlet;
import java.util.Date;
@WebServlet(name = "CalendarServlet", urlPatterns = {"/CalendarServlet"})
public class CalendarServlet extends HttpServlet {
private static final long serialVersionUID = -1915463532411657451L;
public void doGet(HttpServletRequest request, HttpServletResponse response) throws IOException, ServletException {
Map<String, String> data = getData();
response.setContentType("text/html;charset=utf-8");
PrintWriter out = response.getWriter();
try {
// Write some content
out.println("<html>");
out.println("<head>");
out.println("<title>CalendarServlet</title>");
out.println("</head>");
out.println("<body>");
out.println("<h2>Hello " + data.get("username") + ", " + data.get("message") + "</h2>");
out.println("<h2>The time right now is : " + new Date() + "</h2>");
out.println("</body>");
out.println("</html>");
} finally {
out.close();
}
}
public void doPost(HttpServletRequest request, HttpServletResponse response) throws IOException, ServletException {
}
public Map<String, String> getData() {
Map<String, String> data = new HashMap<String, String>();
data.put("username", "walterlife");
data.put("message", "Welcome to my zone");
return data;
}
}在浏览器下输入 http://localhost:8080/ServletDemo/CalendarServlet 即可

处理 Servlet 中的 HttpServletRequest, HttpServletResponse
使用 HttpServletRequest 获得http请求的参数
1
2
String value1 = req.getParameter("param1");
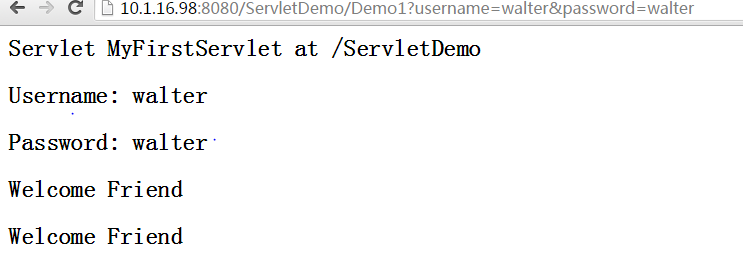
String value1 = req.getParameter("param2");下面例子是传入参数,后端根据参数验证参数给出结果
1
2
3
4
5
6
7
8
9
10
11
12
13
14
15
16
17
18
19
20
21
22
23
24
25
26
27
28
29
30
31
32
33
34
35
36
37
38
39
40
41
42
43
44
45
46
47
48
49
50
51
52
53
54
55
56
57
58
59
60
61
62
package com.walterlife;
import java.io.IOException;
import java.io.PrintWriter;
import javax.servlet.http.HttpServlet;
import javax.servlet.ServletException;
import javax.servlet.http.HttpServletRequest;
import javax.servlet.http.HttpServletResponse;
public class ServletDemo extends HttpServlet {
public void doGet(HttpServletRequest request, HttpServletResponse response) throws IOException, ServletException {
response.setContentType("text/html;charset=utf-8");
PrintWriter out = response.getWriter();
String username = request.getParameter("username");
String password = request.getParameter("password");
boolean success = validateUser(username, password);
try {
// Write some content
out.println("<html>");
out.println("<head>");
out.println("<title>MyFirstServlet</title>");
out.println("</head>");
out.println("<body>");
out.println("<h2>Servlet MyFirstServlet at " + request.getContextPath() + "</h2>");
out.println("<h2>Username: " + username + "</h2>");
out.println("<h2>Password: " + password + "</h2>");
if(success) {
out.println("<h2>Welcome Friend</h2>");
} else {
out.println("<h2>Validate false!Please validate again!!</h2>");
}
out.println("</body>");
out.println("</html>");
} finally {
out.close();
}
}
public void doPost(HttpServletRequest request, HttpServletResponse response) throws IOException, ServletException {
}
public String getServletInfo() {
return "MyFirstServlet";
}
public boolean validateUser(String username, String password) {
if(username == null || password == null) {
return false;
}
if("walter".equals(username) && "walter".equals(password)) {
return true;
}
return false;
}
}运行结果如下
给Servlet 容器注册监听事件
- 当你需要在servlet容器启动或关闭时,处理一些逻辑时,此时你可以添加监听器来监听你感兴趣的事情
- 实现监听器,你需要实现一个类继承自 ServletContextListener,并且实现 contextInitialized, contextDestroyed[参数是ServletContextEvent servletContextEvent]接口函数
- 以下几种方法都可以实现监听器
- 使用@WebListener 注解
- 在 web.xml 中配置 listener
- 使用 ServletContext中的addListener 方法
另外 在Servlet API 中,ServletContextListener并不是唯一的,还有以下Listener
- javax.servlet.ServletRequestListener
- javax.servlet.ServletRequestAttrbiteListener
- javax.servlet.ServletContextListener
- javax.servlet.ServletContextAttributeListener
- javax.servlet.HttpSessionListener
- javax.servlet.HttpSessionAttributeListener
配置 Servlet 初始化参数
在web.xml 中添加类似以下配置,即可以为Servlet 配置参数1
2
3
4
5
6
7
8
9
10
11
12
13
14<web-app>
<servlet>
<servlet-name>SimpleServlet</servlet-name>
<servlet-class>com.howtodoinjava.servlets.SimpleServlet</servlet-class>
<!-- Servlet init param -->
<init-param>
<param-name>name</param-name>
<param-value>value</param-value>
</init-param>
</servlet>
</web-app>
一旦设定了,你可以通过以下方式获取参数的值1
String value = getServletConfig().getInitParameter("name");
为特定的URL请求添加 Servlet Filters
Web filters are useful for pre-processing requests and invoking certain functionality when a given URL is visited. Rather than invoking a servlet that exists at a given URL directly, any filter that contains the same URL pattern will be invoked prior to the servlet. This can be helpful in many situations, perhaps the most useful for performing logging, authentication, or other services that occur in the background without user interaction.
Filters must implement the javax.servlet.Filter interface. Methods contained within this interface include init(), destroy(), and doFilter(). The init() and destroy() methods are invoked by the container. The doFilter() method is used to implement tasks for the filter class. If you want to chain filters or if more than one filter exists for a given URL pattern, they will be invoked in the order in which they are configured in the web.xml deployment descriptor.
To configure the web.xml file to include a filter, use the
If you want to use annotation to configure filters for specific servlets, you can use @WebFilter annotation.
Forward request to another servlet using RequestDispatcher.forward()
Sometimes, your application require that a servlet should hands off requests to other servlets to complete the task that needs to be accomplished. Furthermore, the requests should be handed off without redirecting the client to another URL i.e. the URL in the browser should not change.
The facilities for doing so are built right into the ServletContext, so once you obtain a reference to ServletContext, then you simply call the getRequestDispatcher() method to obtain a RequestDispatcher object that can be used to dispatch the request. When calling the getRequestDispatcher() method, pass a String containing the name of the servlet that you want to hand off the request to. After a RequestDispatcher object has been obtained, invoke its forward method by passing the HttpServletRequest and HttpServletResponse objects to it. The forward method performs the task of handing off the request.
RequestDispatcher rd = servletContext.getRequestDispatcher(“/NextServlet”);
rd.forward(request, response);
Redirect request to another servlet using HttpServletResponse.sendRedirect()
Though is some scenarios you will not like to notify user that servlet redirection has happened as we saw in previous section, but in some scenarios we actually want that to happen. You want to redirect the browser to another URL when a specific URL within your application is visited.
To do this, you will need to call sendRedirect() method of HttpServletResponse object.
httpServletResponse.sendRedirect(“/anotherURL”);
This simple redirect, as opposed to servlet chaining, does not pass the HttpRequest object along to the target address.
Writing and Reading Cookie using Servlets
Many applications wants to store user’s current state of user browsing history in clients machine so that when user return to application again, he start from where he left. Usually for this requirement, cookies are used. You can see cookies as key-value pair based data stored on client’s machine. When application is accesses in browser then application is able to read or write these values.
To create a cookie, simply instantiate a new javax.servlet.http.Cookie object and assign a name and value to it. Once the cookie has been instantiated, properties can be set that will help to configure the cookie. In the example to this recipe, the cookie’s setMaxAge() and setHttpOnly() methods are called, setting the time of life for the cookie and ensuring that it will be guarded against client-side scripting.
Since Servlet 3.0 API, the ability to mark a cookie as HTTP only has become available. This allows the cookie to be safeguarded against client-side scripting attacks, making the cookie more secure.
Cookie cookie = new Cookie(“sessionId”,”123456789”);
cookie.setHttpOnly(true);
cookie.setMaxAge(-30);
response.addCookie(cookie);
Here response is instance of HttpServletResponse passed to doXXX() method.
To read back the cookie information on server sire, use following code:
Cookie[] cookies = request.getCookies();
for(Cookie cookie : cookies)
{
//cookie.getName();
//cookie.getValue()
}